Automatic Date Calculations help creative teams get started on Projects faster by automatically calculating start or due dates for work within a Project based on your specifications. Associating dates to your Project templates is both robust and flexible, letting you customize your workflow based on your team's Project management model.
*Automatic Date Calculations are only available for Business and Enterprise customers.
Adding Automatic Date Calculations
Automatic Date Calculations are built in at the Project template level, then automatically set either the start or due dates in Tasks and Proofs in any new Projects created from that template.
To get started, from the Project template editor select the List dropdown menu from the top left corner and select Gantt. From the new page, to the right of your work item list, click on the dropdown reading "No Calculated Dates" to select how you'd like to calculate dates in this template.
We have a few options to calculate our dates:
Due Dates Calculated from Project Due Date: Schedule your Project by working backwards from your Project due date to configure your Task or Proof due dates.
Due Date Calculations from Project Start Date: Schedule your Project by configuring Task or Proof due dates from the Project start date.
Start Dates Calculated from Project Due Date: Schedule your Project by working backwards from your Project due date to configure your Project start date.
Start Dates Calculated from Project Start Date: Schedule your Project by configuring Task or Proof start dates from the Project start date.
For the remainder of this article, we'll be using Calculate Due Dates from Project Due Date to build out our date calculations, but the process will be similar for any other option.
For each work item in the Project, we'll have these options:

- START: The difference in days that your Task should start. An offset of 1 when calculating start dates from the Project start date would mean your Task starts one day after the Project start date.
- DURATION: The number of days each Task should take. Duration will automatically calculate the start or end date of the Task or Proof that isn't being entered (i.e. if you're populating due date, the start date will automatically calculate).
- DUE: The difference in days that your Task should be due. An offset of -1 when calculating due dates from the Project due date would mean your Task is due one day before the Project due date.
- LEVEL OF EFFORT: The expected level of effort needed for each Task, which helps you manage your team's workload. This does not factor into the automatic date calculations, but is a helpful reference when setting work durations. (See Workload)
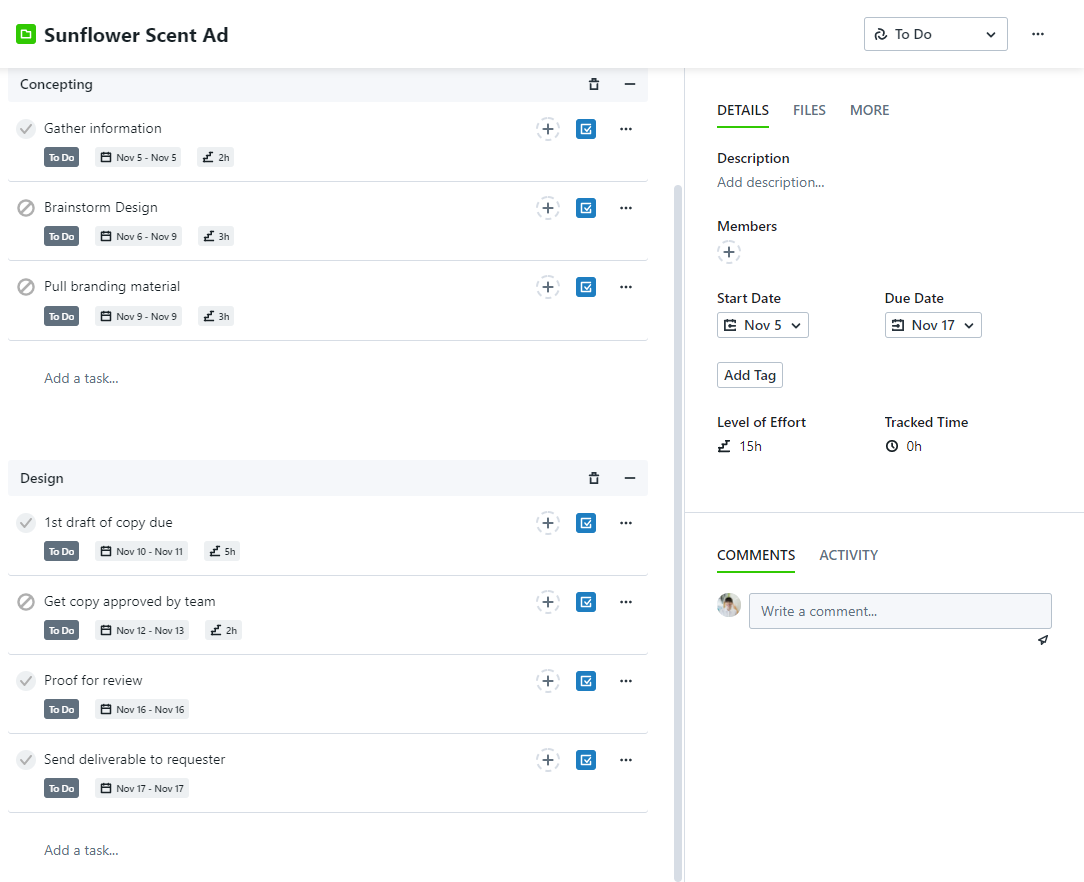
Since we're calculating our due dates based off the Project due date, we're going to work backwards, starting from the final Task. For our team, we want our "Send deliverable to requester" Task to be due on the Project due date, so we'll click next to the Project due date line in our Gantt View, making this due 0 days prior to the due date. As we click into the remaining work items, our options on the left side will automatically update to reflect start, duration, and due dates.
- If you are working backwards from the due date, an orange line will appear indicating an end date. If you are working forwards from the start date, a green line will appear indicating the start date.
- If you have added Custom Color Coding to your tasks, the bars on the Gantt View will match the corresponding Task or Proof's color.
Looking over the left side of our Project planning view, we can edit the DURATION, DUE, and LEVEL OF EFFORT fields, but not START. This is because we've opted to calculate our due dates; if we'd chosen either of the two options to calculate start dates, that field would be editable and DUE would not be. The Duration field will automatically calculate whichever field we did not choose to calculate.
As these fields are manually updated, our Gantt View shifts accordingly.
Dependencies can also be configured from this view by clicking the circle next to our work item in the calendar view and dragging to the correlating work item.
This is how our automatic date calculations will look in action once we've published the Project template and created a new Project from it: